Data filters
Several data filters are available within Movebank that provide flexible, automated and repeatable methods for identifying location outliers. Data Managers can use these filters to flag location events as outliers, after which they are no longer visible by default from the Tracking Data Map, but remain part of your data. Filter settings can be removed or updated anytime.
If you are not a Data Manager on a study, or want to subset and filter data for a specific use case, see the many filtering apps available in our analysis platform, MoveApps.
Filter types
General purpose data filters allow you to flexibly filter data based on duplicate values, speed between consecutive locations, or custom rules based on attribute values. They can be applied to all tracking data.
Argos data filters are specifically designed for Argos Doppler-based locations. Data can be filtered based on Argos location class or the Douglas Argos Filter.
The Argos and general purpose data filters cannot both be applied to the same data.
Running filters
Data filters can be run within the Event Editor or from the Studies page. For studies with fewer than 500,000 events, we recommend running filters from within the Event Editor, where you can interactively view results on a map and table. For larger studies, which cannot be viewed in full in the Event Editor, filters can be run from the Studies page.
Filtering in the Event Editor
To run filters from the Event Editor,
- Select the study, an animal or a tag from the Studies page.
- Select Manage > Event Editor from the Studies menu to open the Event Editor.
- Select a sensor type if asked.
- After the data have loaded, select Filter data (located above the sensor type and study name) and choose a filter type.
- Choose which filter and settings you want to use:
- Instructions for general purpose data filters
- Instructions for Argos data filters
- Select Run to run the filter/s.
- Evaluate your results on the table and map.
- You may re-run filters as many times as you like, or clear filtering by selecting Filter data > Undo filtering.
- Select Save (located below the table) to save the filter settings.
Filtering in the Studies page
To run filters from the Studies page,
- Select the study from the Studies page.
- Select Manage > Create new filter from the Studies menu.
- If asked to select a sensor type, select one. If you choose Argos Doppler Shift and the Argos filter options are disabled and say "not applicable", this is because the data do not contain the minimum attributes needed.
- Choose which filter and settings you want to use:
- Instructions for general purpose data filters
- Instructions for Argos data filters
- If you select Reset active filters, changes made by previous filters will be removed before applying the new settings. To replace existing filter settings and results, make sure this is selected. To apply multiple filters, for example, a speed filter followed by a duplicate filter, do not select this.
- Select Run filters to run the filter. After selecting Run filter, you will be redirected to Pending Filter Operations.
Filter results and visible locations
Applying filters as described above will mark some events with the value “true” in the attribute Algorithm Marked Outlier and affect which locations are visible as described below. It will not delete or modify any other part of the data. After running the filters, manually spot-check your results to ensure that the filter accomplished what you intended. The Tracking Data Map will take several minutes to update to reflect filter results, with progress indicated in the study's Processing status (read more).
Filters can be flexibly used for quality control of your data in Movebank. The Algorithm Marked Outlier values are used in combination with values in the attributes Manually Marked Outlier, Import Marked Outlier and Manually Marked Valid to define which events are visible in the Tracking Data Map. These locations have the value "true" in the attribute Visible. Records that are not visible (Visible = "false") will show up as red Xs on the map in the Event Editor and will no longer appear on the Tracking Data Map. They remain part of the full dataset and can be optionally included in downloaded data.
Manually marked outliers will override values in Algorithm Marked Outlier for determining what records are visible on the map. Events marked as "true" in Manually Marked Outlier or Import Marked Outlier prior to running the filter will be ignored by the filter. You can override the filter results for individual events using the attribute manually marked valid by assigning the value "true".
Pending filter operations
Select Manage > Pending filter operations from the Studies menu to view the status of pending filters that were run from the Studies page:
- Progress: An approximate indication of filter progress.
- Filter type: The chosen filter type.
- Reset: Whether "reset active filter" was selected, which will remove results from previous filters prior to processing with the new settings.
- Sensor type: The sensor type for which the filter is applied.
- Status: The status of the filter progress.
- Processed: The number of events that have been processed.
- Filtered: The number of events that have been flagged by the filter.

In many cases, the Progress bar will complete and the Status will show as "preprocessed" within a few seconds. For very large studies, or if filters in other studies are being processed, progress can take longer. In these cases the status will show first as "new", then "queued" and then "running". Once the status is "preprocessed", this means the filtering is complete. Select "Apply to study" to save the filter results, or "Remove" to remove the filter without affecting your study. If no locations are filtered, there will be no option to save the results.
Filter history
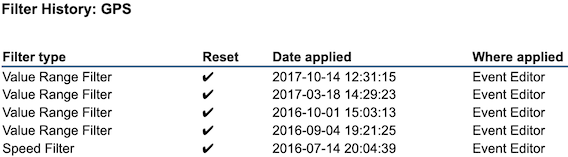
Select Manage > Filter history from the Studies menu to view a list of filters that have been applied to the study:
- Filter type: The filter applied.
- Reset: If this is checked, changes made by previous filters were removed before these settings were applied.
- Date applied: The date and time that the filter was applied.
- Where applied: Whether the filter was applied in the Event Editor or Studies page.
Select Clear history to remove all entries from the filter history. This does not affect the filtering in your study.
Remove filters
To clear all filtering in your study,
- From the Studies page, select Manage > Reset filtering from the Studies menu.
- From the Event Editor, select Filter data > Undo filtering.
Quality control of uploaded data
Define deployments and outliers
Data filters